Motivation
Hi all!
Those who know me, know that I am passionate about Classic Legacy.
It is the time span in Magic History that resonates the most with me, the one that also brings me more nostalgia, as it is when I really started being active into competitive Magic, by competitive I mean I was attending all local tournaments and some GPs. It is also where I made most of my Magic friends and that is definitely the most important thing and what really makes me remember this particular period of time with much love. It is full of fond memories.
You might have seen me actively promoting the format from approx. April-May 2023, and since then I always had a personal goal: understanding Dredge inside out.
Even though I played Dredge a bit back then, I never spent enough time understanding the archetype and its “Why’s?” and “How’s?”. Moreover, I always felt the deck was missing some numerical consistency, more about that later, and this kinda bugged me. I wanted to make sense out of the numbers of the deck. I wanted, in this sense, to find The Perfect Dredge.
Before moving on, let me shout out to a couple of friends that helped me out throughout this journey. Thanks Àlex Mateu for your always sensible advice and broad Magic knowledge, Artur Sánchez for your experience and, sometimes chaotic, brainstorming about the archetype and other graveyard strategies, last, but not least, thanks Yusep García for sharing all your knowledge about the archetype, that we might or might not agree on, but always helpful in the form of endless chats or invaluable content (Check out his Youtube channel!, note that it’s in Spanish).
Historical context
Dredge strategy dates back to the release of the original Ravnica block, where the ability was firstly introduced.
What is Dredge though?
Well, Dredge is a replacement ability to any draw you might have during the game. If you have a card with the Dredge keyword in the graveyard and you are about to draw a card you can, instead, replace the draw with the Dredge ability. This means you will put the card with “Dredge X” into your hand and to do so you will “mill” (glad that WotC decided to create this new keyword, it makes my writing a lot easier!) X cards. I will say it once in case you are not familiar. Mill means to put cards from the top of your deck directly into your graveyard.
This mechanic was originally intended to fairly recover your cards with Dredge and reuse them, either because they have been countered, destroyed or whatnot. However, this ability had the potential to be broken and this is what this deck did very well.
Deck structure
The deck structure has always been quite similar. We can split the cards in the following 6 categories: enablers, draw effects, dredgers, lands, threats and sac outlets, and anti-hate pieces.
Enablers
We call enablers to those cards that allow you to put your cards in your graveyard, particularly, but not only, the dredgers (see below). You can see that there might be overlap with cards from another category, the “draw effects”. This is because most draw effects we have will also put you some cards in the graveyard.
We call them enablers because without them you won’t be able to start executing your game plan that requires dredging as many cards as possible. You might need to find a way for your dredgers into your graveyard.
I might say these are the most important cards in your deck, together with the dredgers, and lands of course. This is because you might be only casting 1, maybe, 2 spells from your hand per game and, at least, 1 of those needs to be an enabler. The rest of cards you will play during the game will, most likely, be played from the graveyard, we will see how later.
Some examples of enablers are: Putrid Imp, Tireless Tribe, Careful Study, Breakthrough, Lion’s Eye Diamond or even Cabal Therapy (targeting yourself).
Draw effects
Simply enough, draw effects are those effects that allow you to draw cards! What can I say, pretty intuitive…
These are important cards, not as important as the enablers though, because they allow you to speed up your game plan. Once you have some dredgers in your graveyard, if you play a draw effect you will be able to Dredge even further in the same turn replacing your draw. This is incredibly powerful as you are transforming a “draw 2” into a potential “draw 12”, if you Dredge 2 cards when you have two cards with “Dredge 6” ability available in your graveyard, that’s because you will be mostly playing your cards from your graveyard, as we mentioned before.
Some common draw effects in Dredge are: Careful Study, Breakthrough, Deep Analysis, Cephalid Sage/Sphinx of Lost Truths (more on this later on) or Cephalid Coliseum.
Note that draws from Draw X cards resolve one at a time. This is important because you will be able to replace every draw with dredgers that might have fallen into your graveyard during the previous card you drew/dredged with that same draw effect.
3 = 1+1+1
Dredgers
Well, these give names to the deck so it might be good to understand what they are.
These cards refer to any card with the ability “Dredge X” (where X is a number). They will allow you, once they are in your graveyard, to replace your draws with mill X cards and put the given dredger in your hand instead.
You want to dredge as many cards as possible during your game (specially in game 1 where the hate is low or non-existent, in games 2 and 3 you might want to be more careful when dredging). By doing so, you will fill up your graveyard with cards that will either trigger interesting effects or will have Flashback so you will be able to play them from your graveyard.
The best dredgers I can think of are: Golgari Grave-Troll (Dredge 6), Stinkweed Imp (Dredge 5), Golgari Thug (Dredge 4), Darkblast (Dredge 3) or even Life from the Loam (Dredge 3).
Lands
Truth be told, you will not use your lands as much as other decks, but you will definitely need some to get your engine going. Most enablers require 1 mana to be played, and we have already mentioned how critical it is to resolve at least 1 enabler per game.
There are different kinds of Dredge decks and all of them play a slightly different manabase given the different requirements they have. However, it is safe to say, most Dredge decks play a 5C list which naturally requires a “rainbow lands” (lands that produce mana of any color) mana base. Some iterations of the deck, though, were strictly UB or even UBg which allow them to play a different array of lands taking advantage of some of the benefits fetchalnds and dual lands might have.
The most common lands played in dredge decks are: Gemstone Mine, City of Brass and Cephalid Coliseum. You can also see some versions playing Undiscovered Paradise and even Tarnished Citadel. Lastly, as I mentioned before, there are some less played versions that use fetchlands and dual lands to make use and abuse of Life from the Loam and Bloodghast (this one can also pair up with Dakmor Salvage).
It’s worth talking about Cephalid Coliseum a bit separately. Not only because it is the only land that generates just one color, blue, which makes it the most important, aka the easiest to cast, color of the deck, but also because this card is, at the same time, a draw effect thanks to its threshold activated ability. This makes it a staple across every single version of dredge ever been and will be.
Threats and sac outlets
All the above cards are clearly required to develop your plan, but you won’t have a plan if you can’t kill your opponent! That is the goal of the game after all.
Your threats are the cards that allow you to end the game, ie kill your opponent. The way Dredge decks kill their opponent, oftentimes require creatures and the attack phase.
Your most common threats are: Ichorid, Narcomoeba, Bridge from Below and Bloodghast.
I think it is worth speaking of them individually.
Some people used to call the deck “Ichorid” instead of “Dredge”, that can give you the idea of how important this creature is to the archetype. Ichorid is a creature that you can play fairly by casting it from your hand for B3, it is a 3/1 creature with haste that will be sacrificed at the end of turn. Let me tell you something, you will, almost, never cast it like this. The interesting part is that if Ichorid is in your graveyard, you can exile another black creature, other than himself, to allow him to come back into play during your upkeep. Well, that’s interesting! A free 3/1 haste is a great deal! The fact that it needs to be sacrificed at the end of your turn is also very important as you will see in a bit.
Narcomeoba is a 1/1 Flyer for U1 with the peculiarity that it has a trigger whenever it gets milled. The trigger allows you to put it into play for free. There we go! More free bodies! It seems that everything is coming together now…
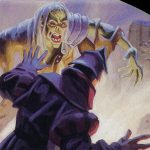
Bridge from Below is a weird card, a very weird card indeed. The card is an enchantment that costs BBB and does nothing while in play, but we don’t care much about that. The important part is that it reads as follows:
“Whenever a nontoken creature is put into your graveyard from the battlefield, if Bridge from Below is in your graveyard, create a 2/2 black Zombie creature token.
When a creature is put into an opponent’s graveyard from the battlefield, if Bridge from Below is in your graveyard, exile Bridge from Below.”
So, while Bridge from Below is in your graveyard, any time one of your (nontoken) creatures die, you will trigger an effect that will put into play a 2/2 zombie. More freebies! How are we going to abuse this ability will come a couple of paragraphs below. Be careful, though, if any of your opponent’s creatures go to the graveyard you will lose (ie exile) all copies of Bridge from Below you currently have in your graveyard, this makes things a bit tricky, specially vs certain match ups, and your will need to learn how to best handle these of situations. Protip: be careful of mogg fanatic.
Bloodghast was a late arrival to the party, late if we are thinking about that period of time of course, and it was not adopted in all Dredge strategies but it was powerful enough to define a new variation of the archetype: Next Level Dredge.
Now, I’d like to talk about an important subcategory of cards in the deck. The reason why I have named this category: threats and sac outlets, is because those sac outlets will easily turn into more threats thanks to the aforementioned card Bridge from Below! Remember that whenever a nontoken creature is put into your graveyard you will in exchange add a 2/2 zombie to your board for each Bridge from Below you have in there.
The most common sac outlets are: Cabal Therapy and Dread Return.
Cabal Therapy is a 4-of in any Dredge deck. It is not only a great sac outlet, it requires you to sac just 1 creature, but also can be used as an enabler, as we mentioned before. Big part of Dredge plan comes through resolving several Cabal Therapies in one turn, after dredging big part of your library, in order to amass a legion of 2/2 zombies while stripping away from your opponent’s hand any potentially useful card, that is cards that might win you in the upcoming turn (combo pieces), cards that might deal with your legion of zombies (Engineered Explosives, Firespout, …), or cards that allow your opponent find any of those cards (cantrips, tutors, …).
The other sac outlet is Dread Return. Not all versions of Dredge play Dread return in the main deck or at all in their 75, but most versions do. Dread Return allows you to sacrifice 3 creatures (is the cost you pay for its flashback) in order to target a creature in your graveyard and bring it back to the battlefield. So, on top of leaving a nice share of zombies behind, this card adds something new to your strategy: the capacity to reanimate any creature in your graveyard. One common play can be simply to reanimate a massive Golgari Grave-Troll, if you lack any other interesting targets he might get the job done. However, there are a couple of creatures that are played exclusively because we play Dread Return, from now on “Dread Return targets”.
Cephalid Sage and Sphinx of Lost Truths are two Dread Return targets that serve as a draw effect. Which one is better hugely depends on the rest of your build, but most builds prefer to play Sphinx over Cephalid Sage as they can’t make good use of the ability of keeping one card in hand (Next Level Dredge, though, does benefit from that).
Flame-kin Zealot is a Dread Return target that is commonly used as a “combo kill enabler”. When Flame-kin Zealot enters the battlefield he triggers an ability that gives +1/+1 and haste to all your creatures on the Battlefield. Imagine a board filled with 2/2 zombies, now with haste! Even though this sounds very appealing, I would argue that this might be a winmore play, most of the time.
Some other nice Dread Return targets that see play for different reasons in the main decks or sideboards of Dredge are: Iona, Shield of Emeria, Ancestor’s Chosen, Angel of Despair, Terastodon or Blazing Archon.
Anti-Hate Pieces
These are, broadly speaking, your sideboard cards. We have already mentioned that Dredge is a deck that is massively favored in game 1 against most of the common decks. However, that changes quite drastically when we enter game 2 and 3. Because of how one-sided the game 1 is, a lot of Classic Legacy decks tend to overload their sideboard with specific hate pieces to fight Dredge. The most common dedicated hate pieces come in the form of anti-graveyard cards. In that spectrum, you might often face things like Tormod’s Crypt, Relic of Progenitus, Leyline of the Void, Extirpate, Ravenous Trap, Faerie Macabre or Yixlid Jailer. There are some other cards that affect your strategy and set you back like Ensnaring Bridge, Ghostly Prison or Blazing Archon.
Siding with Dredge is extremely metagame dependent and you really need to understand what is the most common hate you will face as your sideboard cards might need to adapt to those hate pieces in the best possible way.
That being said, what are our solutions to hate? What are our anti-hate pieces?
Fortunately we have a variety of solutions to choose from, but not all of them are equally effective. Let me go through some of them.
Chain of Vapor
- Strengths: very flexible, it solves any potential pieces of hate except hand-based hate like Extirpate, Ravenous Trap or Faerie Macabre. Plays on-color (blue). Has a positive synergy with Cabal Therapy (Bounce + Discard).
- Weaknesses: multiple pieces of hate and really long games.
- Recommended: if your metagame is filled with: really anything but more concretely is quite good vs Reanimator (bouncing a Blazing Archon can be the difference between winning and losing).
Pithing Needle
- Strengths: Colorless makes it easy to cast. Solves any activated ability that might hose you like Tormod’s Crypt, Relic of Progenitus or Faerie Macabre. Splash damage on commonly used cards like Sensei’s Divining Top, Wasteland, Engineered Explosives, Pernicious Deed, … you name it.
- Weaknesses: You need to preemptively play it. If you play it when the hate is already on the board your opponents might be able to activate the piece of hate with Needle on the stack, this might or might not be concerning but we must bear that in mind. It can be dealt with as it is an artifact and is played upfront.
- Recommended: if your metagame is filled with: Countertop, tribal aggro decks (Goblins and Merfolks), burn, …
Nature’s Claim
- Strengths: 1 casting cost is always good. It gets rid of any enchantment or artifact for good, namely Tormod’s Crypt, Relic of Progenitus or Leyline of the Void.
- Weaknesses: “off-color” (not blue). The 4 extra lives might make you lose the race in tight match-ups.
- Recommended: if your metagame is filled with: any deck potentially playing Leyline of the Void, like Eva Green, Team America or any other Black based deck that can cast them and/or protect them efficiently. Also useful vs Stax or other prison decks.
Ancient Grudge
- Strengths: You can play it “as-you-dredge” thanks to the flashback cost. Deals with any artifact like Tormod’s Crypt, Relic of Progenitus, but also things like Ensnaring Bridge. Have the possibility to be a 2×1 if you can naturally draw it.
- Weaknesses: Played from hand is more expensive than we might like (costing 2 mana). Only targets artifacts. “Off-color” (not blue).
- Recommended: if your metagame is filled with: Countertop, tribal aggro decks (Goblins and Merfolks) and decks packing Ensnaring Bridge or other hateful artifacts.
Ray of Revelation
- Strengths: You can play it “as-you-dredge” thanks to the flashback cost. Deals with any enchantments like Leyline of the Void (even though it is not particularly effective unless you can naturally draw it) but also things like Ghostly Prison, Moat and other prison pieces. Have the possibility to be a 2×1 if you can naturally draw it.
- Weaknesses: Played from hand is more expensive than we might like (costing 2 mana). Only targets enchantments. “Off-color” (not blue).
- Recommended: if your metagame is filled with: Like Nature’s claim but this is even more effective vs Stax and Prison decks. Not only for the possibility of 2×1 but also because playing it “as.-you-dredge” can be very useful to destroy any random hateful enchantment preventing you from winning like Ghostly Prison.
Note that both Ancient Grudge and Ray of Revelation have their creature with Evoke counterparts: Ingot Chewer and Wispmare. They are useful in similar scenarios to Grudge and Ray but they have slightly different strengths and weaknesses.
The main upside Evoke creatures have is the fact that they will trigger your Bridges after you play them for their Evoke cost, leaving extra zombies behind, they can also exile your opponent’s Bridges in the mirror match. However, don’t expect this to happen too often when targeting a Tormod’s Crypt, Relic of Progenitus or Leyline of the Void, which are the primary targets. Another minor benefit is that they play easier around Chalice of the Void, since the Evoke cost does not modify their Casting Cost or even Thorn of Amethyst, they are creatures after all. On the downside, they play at sorcery speed, and this really matters as you will often be low on mana and having the flexibility to use your mana during your opponent’s turn and your turn might be a good way to get some spells through. All in all, they seem worse than Grudge and Ray to me.
Firestorm
This is a very particular card I’d like to treat slightly differently. Firestorm does not solve any particular piece of hate, well it does kill Yixlid Jailer for what it’s worth. The main purpose of FIrestorm, though, is to have an enabler that can save you some time by killing some key creatures, like Goblin Lackey, and at the same time it’s an “uncounterable” enabler! Yes! Discarding cards with Firestorm is part of the cost. This means that, even though they counter it you will end up with your dredgers exactly where you want them to be: in your graveyard.
Dread Return Targets
The last bit of the anti-hate pieces belong to some nice Dread Return targets that will help you not only to overcome tricky situations but also can straight away win you some games.
The three most common Dread Return targets that are used to this end are: Iona, Shield of Emeria, Ancestor’s Chosen and Angel of Despair/Terastodon.
Iona, Shield of Emeria is a powerhouse. The ability to shut down one of the opponent’s colors can single-handedly win you games. Imagine you are playing against a Storm Tendrils player and you name black, or playing vs a Burn player and you name red, those are the kind of game winning scenarios that Iona can steal by herself.
With the amount of cards you might put into your graveyard, returning an Ancestor’s Chosen to the battlefield might grant you an insane amount of life. Doing this vs a very aggressive deck can give you enough time to navigate the game and win it after your opponent has run out of gas. It is also particularly useful vs Storm Tendrils decks putting yourself at 35+ lives can make it very tough for your opponent to storm you out.
The last creature, actually 2 creatures but serving a very similar purpose, is Angel of Despair/Terastodon. These creatures might allow you to destroy any annoying permanent that might be preventing you from attacking. The main difference is that Angel can target creatures, hence making it useful against the feared Blazing Archon, but Terastodon can blow 3 permanents in one hit, making it an incredible tool vs prison decks.
Most Common Lists
Traditional Dredge decks can be split, largely, into:
- LED Dredge
- LED-less Dredge
- Next Level Dredge
As a curiosity, I would also like to mention Loam Dredge, that was not as commonly adopted, but is structurally very different
Which version is better is pretty much metagame dependent. While LED Dredge raw power can give you the edge vs faster decks it can also be more vulnerable to grinder strategies, and the contrary happens to the slower versions of the deck (LED-less Dredge and Next Level Dredge). It is up to you to decide which version fits your metagame better, and also your playstyle.
LED Dredge
This is the fastest variant. It can kill as early as turn 1 on a very lucky draw (Dredge).
What makes it different is that it exchanges some consistency in favor of raw power and the capacity to outrace even the fastest decks in the format.
The cards that define this version of Dredge are: Lion’s Eye Diamond (LED), Deep Analysis and Flame-kin Zealot.
LED, on top of being an enabler, allows you to activate the Flashback cost of Deep Analysis to keep dredging cards as soon as it touches your graveyard. It also enables crazy starts. Imagine the following hand:
LED, Breakthrough, any land, any dredger (ideally Golgari Grave-Troll)
With only these 4 cards you can do the following: play LED, play your land and cast your Breakthrough for U. In response to your breakthrough you crack your LED and discard your dredger. Now, you have Breakthrough on the stack, your dredger in your graveyard and UUU floating. Your Breakthrough resolves and you Dredge potentially hitting more dredgers (you might Dredge up to 4 times!), if you have hit any Deep Analysis in any of those 4 Draw/Dredge you will be able to cast it with the floating mana of your LED dredging 2 more times! As a result, in your first turn you could have easily have dredged up to 36 cards, that might suffice to even be able to Dread Return your Sphinx of Lost Truths/Cephalid Sage or you Flame-kin Zealot securing a turn 1 kill.
This is an example of LED Dredge list.
LED-less Dredge
Contrariwise to LED Dredge, this version values stability over speed. LED-less Dredge is happy to delay their game plan for a turn or 2 in exchange for a safer build with access to more stable enablers and lands and less draw effects.
The cards defining this version are: some extra lands and Tireless Tribe.
The rationale of why we might want this is the following. Dredge is a strategy that is immensely favored in game 1, simply because most decks don’t pack enough cards that are capable to interact with our strategy (eg graveyard hate cards), this means that even though you are doing “your thing” slower you are quite likely to win game 1 anyway. Then, by having a safer build you are better suited to face the more complicated games 2 and 3. Having more lands to eventually cast your cards instead of just Dredge them (for instance you can cast Stinkweed Imp for B2) is important to deviate the attention from your graveyard and diversify your angles of attack, once your opponent has refined their deck after sideboarding. Also, the fact that we are playing more enablers that stay on board (like Tireless Tribe) allow us to rebuild a lot easier once our opponent blows our graveyard away with cards like Tormod’s Crypt of Relic of Progenitus.
This is an example of LED-less Dredge.
Next Level Dredge
Next Level Dredge might be “the grindiest” version of them all. The fact that it packs Bloodghast on top of Ichorids (to a total of up to 8 recurrent threats) can make it very resilient to graveyard hate as every time they blow out your graveyard they will blow out a smaller proportion of your threats, ending up in an easier recovery from your side as the Dredge player.
The cards that define this archetype are: Bloodghast, Undiscovered Paradise and Dakmor Salvage, but also Cephalid Sage.
Bloodghast is a recurrent threat that requires “landfall” (ie when you play a land Bloodghast triggers from the graveyard and enters the battlefield), for this reason it normally comes together with Undiscovered Paradise (so you can replay it every turn to bring Bloodghast back) and Dakmor Salvage (as you can Dredge it and play it to trigger Bloodghast’s landfall ability).
As we mentioned before, this version of Dredge does benefit from Cephalid Sage’s part of “discard 2” (instead of 3) cards. Why? Well, if you use Cephalid sage ability to Dredge extra cards, one of those cards you Dredge can be Dakmor Salvage (the land with Dredge 2) after resolving the ability, you might want to keep this land in your hand to play it straight away and bring back any Bloodghasts you might have in your graveyard. It might seem a subtle detail, but the devil is in the details!
This is an example of Next Level Dredge.
Loam Dredge
The last variation of Dredge is also the least popular.
This version makes use of the spell Life from the Loam to recover some lands from your graveyard with the goal of continuously triggering Bloodghast’s ability or play several Cephalid Coliseums to speed up your kill.
The cards that define this archetype are: Bloodghast, Life from the Loam and the fetchlands.
There is a nice trick you can only do with this variation of Dredge to play around graveyard hate. Let’s say you have some Bloodghasts in the graveyard and your opponent has a Tormod’s Crypt on board. Imagine you play a fetchland to trigger your Bloodghasts ability and bring them back to the board, if your opponent sacrifices the Crypt to remove your graveyard and prevent the Bloodghasts to come back you can, in response, sacrifice your fetchland to find a suitable land to trigger your Bloodghasts once again. The result will be your graveyard gone for good but, at least, your Bloodghasts will be back to the battlefield.
This is an example of Loam Dredge.
The Perfect Dredge
OK, but then, what about this Perfect Dredge I mentioned at the beginning of the article? Here we go.
First of all, let me point out that this is “perfect” not in the sense that it is “the best” build for Dredge in a vacuum, there are so many variables affecting the concept of “best version” that I will leave this for you to decide. This is The Perfect Dredge from a numerical standpoint. It is the build I found is statistically more sound, while not sacrificing its power level.
Why is this good or important?
Having a statistically sound deck will make you take less mulligans which, in turn, will help you to navigate your opponents’ resistance in an easier way because you will have more resources in your hand as a result of that. Having a statistically sound deck will also help you predict your draws/dredges better which, in turn, will help you make tough decisions during the game much more simply. Finally, having a statistically sound deck minimizes variance of your draws/dredges, reducing the luck factor impacting the outcome of the game.
Let’s go back to the basics. What is the ideal keepable hand for a Dredge player?
As a Dredge player, I want to keep a hand that has at least:
- 1x Enabler
- 1x Land
- 1x Dredger
- 1x Draw Effect
I would almost always mull to 6 looking for that hand in the dark if it is not in my initial 7.
And the minimum keepable hand (the one I would keep after mulliganing once or twice) would be exactly like the one above but without the Draw Effect, if you ask me.
With this in mind, and I won’t go too deep into technicalities but some are needed, what is the minimum number of each card category I need in my deck to “make sure” that I will draw a hand like this with, potentially, no mulligans? The answer is 14 of each (source: hypergeometric distribution).
Trust me if I tell you that with 14 copies of a given card you have a chance of 91.4% of drawing at least one in your initial 7 cards.
This 91.4% is an average. This means that 9/10 times you are likely to draw that card category. Does that mean that, if I draw 10 hands, 9 of them will always have that card category? No, that means that, if you do it a lot of times, the most common scenario is drawing at least one copy of that card category in your hand. Again, enough technicalities, these are not the point of the article. I’m happy to discuss them offline if you are curious or have any feedback.
So, I assume we agreed 14 is the magic number. This means, if we want to draw an ideal keepable hand very often minimizing our mulligans, we need to have in our deck at least:
- 14x Enablers
- 14x Lands
- 14x Dredgers
- 14x Draw Effects
How do we do this? Well it is not a simple task and you might need to take some licenses, for example having cards that play a dual role (strictly speaking this messes up the numbers, but as I said you need to take some licenses and it will be our best effort).
Without further ado, here it is:
Creatures (27)
 Sphinx of Lost Truths
1
 Tireless Tribe
2
 Putrid Imp
4
 Narcomoeba
4
 Ichorid
4
 Golgari Grave-Troll
4
 Stinkweed Imp
4
 Golgari Thug
4
Spells (15)
 Darkblast
1
 Dread Return
2
 Careful Study
4
 Breakthrough
4
 Cabal Therapy
4
Enchantments (4)
 Bridge from Below
4
Lands (14)
 Undiscovered Paradise
2
 Gemstone Mine
4
 City of Brass
4
 Cephalid Coliseum
4
You might say this is just another version of LED-less Dredge and it would be a fair assessment. However, I can tell you this is not how this deck was built. I have not started from a LED-less Dredge and modified it accordingly, but rather started it from the scratch and coincidentally ended up in something very close to a LED-less Dredge. But the devil is in the details. Let me explain to you.
Card Selection
14 Enablers (actually 18)
- 4 Putrid Imp: this is one of the best enablers there is. It does not only allow you to put your cards where they belong. It is also a black creature that can feed our Ichorids and can also grind some games by slowly hitting your opponent through the air 2 points at a time.
- 2 Tireless Tribe: a good enabler that also helps you hold your opponent back if their plan is to beat you down. A 1/5 for 1 mana is a good deal vs aggro decks.
- 4 Careful Study: plays a dual role as enabler and a draw effect. Very powerful, but a one shot card as it is a sorcery.
- 4 Breakthrough: this is a real bomb but also very risky. Similarly to Careful study, it plays a dual role. However, as an enabler is a real all-in because you will end up with your full hand in your graveyard after it resolves.
- 4 Cabal Therapy: Technically speaking the deck plays 18 enablers. As we said before, targeting yourself with Cabal Therapy is a viable way to put your Dredgers in your graveyard. However, I prefer to see it as a disruption piece in a fast-paced format as is Classic Legacy and a sac outlet to generate extra zombies.
14 Draw Effects
- 4 Careful Study: we mentioned it before. Very versatile. It can help you Dredge a fair amount of cards or simply dig a bit deeper through your deck in case you are looking for some specific card.
- 4 Breakthrough: even though, as an enabler is not a great one, we can say that it definitely is a great draw effect. Dredging 4 cards with a single card is as good as you will get. Note that this is also a very risky card that, more often than not, will be sided out in games 2 and 3 given the gridnier nature of your game plan to circumvent hate pieces.
- 4 Cephalid Coliseum: another dual role card. In this case a land and a draw effect. The fact that it is a blue card makes all your blue cards more relevant and easier to cast.
- 2 Dread Return (+ Sphinx of Lost Truths): to round the number of draw effects to 14 we have the 2 Dread Returns in combination with Sphinx of Lost Truths. Reanimating the Sphinx gives you an additional “Cephalid Coliseum” effect, dredging 3 more cards and then discarding 3. Note that this is particularly nice because you don’t need to draw it naturally but, on the contrary, you can play it as “as-you-dredge”. This small engine can easily set up very strong boards as early as turn 2, for a potential turn 3 kill.
13 Dredgers
Hey! Didn’t you say that 14 is the magic number?! Why are you playing 13 dredgers?
Truth is that the deck is quite tight and there is a compromise on the number of cards you can play in each category. All in all, I ended up in a dead end where I had to choose to either play 13 lands and 14 dredgers or, the other way around, 14 lands and 13 dredgers.
I decided to go this way (14 lands and 13 dredgers) for two reasons:
- The risk of not drawing lands is higher than the risk of not drawing dredgers. If you draw a dredger but have no land to play your enabler and put it into your graveyard you will need to mulligan in the same way as if you had not drawn the dredger at all!
- Lands are way more important than dredgers in games 2 and 3 which can be 67% of your games. Games 2 and 3 are often played at a slower pace. You need to Dredge more carefully trying to force your opponent to play their hate. You might also need to hard cast your creatures and maybe use them to beat down. Having more lands is beneficial in both scenarios.
These are the 13 dredgers:
- 4 Golgari Grave-Troll: The best dredger thanks to his “Dredge 6” ability. 6 Is as much as you will be able to dredge out of a single card. It can also be a nice Dread Return target, a 9/9 (or more) creature with regenerate can go distance if unchecked.
- 4 Stinkweed Imp: Dredge 5 is also a decent amount. Stinkweed Imp is also a nice “castable” creature, for the cost of B2 you have 1/2 flyer with, effectively, Deathtouch. The cherry on the cake is that it’s a black creature that can be exiled to bring Ichorid black to play.
- 4 Golgari Thug: not as good as the two above, but still a Dredge 4 card. It is also a “castable” creature for the cost of B1 you have a 1/1 body that can be sacrificed to your sac outlets in exchange of zombies and while doing so he will trigger an ability that allows you to put back on top of you library a card from your graveyard, for instance you can bring back a fresh Narcomoeba that was already destroyed or discarded.
- 1 Darkblast: after the 12 dredgers above the next best Dredge card, only Dredges 3 cards and out of those that Dredge 3, Darkblast is the most useful for us. It can help us fight some hate like Yixlid Jailer or other tricky creatures like Mogg Fanatic, Goblin Lackey or Dark Confidant and it can also be used to kill your own creatures to trigger your Bridges from Below and get some zombies back to life. Note there is a neat trick with Darkblast, it can potentially kill a 2 resistance creature. If you play it during your upkeep targeting, say a Stoneforge Mystic, and you Dredge it during your draw phase, you might be able to replay it targeting the same Stoneforge Mystic killing it for good.
In terms of numerical consistency, playing 13 copies of our dredgers decreases the odds of drawing at least one dredger in our initial hand from 91.4% to 89.1%.
14 Lands
- 4 City of Brass + 4 Gemstone Mine: the core of our mana base. They allow us to play all our spells and their downsides are, almost, irrelevant given the amount of spells that we will cast from hand during a game. Note that in games 2 and 3, City of Brass is slightly better as you might need to use it more than in game 1 if you plan to hard cast your creatures or other spells.
- 4 Cephalid Coliseum: mentioned before. This card defines our deck. Grants a powerful draw engine and makes all our blue cards more relevant.
- 2 Undiscovered Paradise: topping City of Brass and Gemstone Mine we have 2 Undiscovered Paradise. Terrible in multiples that’s why we play just 2 of them. The other alternative to this card was Tarnished Citadel, but I have never been a huge fan of lightning bolting my face in exchange for 1 mana.
Threats and sac outlets
This is a pretty standard package:
- 4 Ichorid
- 4 Narcomoeba
- 4 Bridge from Below
- 4 Cabal Therapy.
I have also considered adding Bloodghasts to the mix, both to the main deck and to the sideboard and I have to say I am still not sure they are good or even needed. I will leave this for later testing stages. Who knows? Maybe they will find their way back to the deck!
I have decided not to add Flame-kin Zealot because it really feels like a winmore card and we are very tight in deck slots. Most games ending the game on the spot is as useful as filling your board with zombies and stripping all potential useful cards from your opponent’s hand. The only scenario I can see detrimental not playing it is in the mirror matches where, if they play it and you don’t, you are slightly disfavored. In any other match up, I am happy to strip my opponent’s hand away of useful cards and risk it to a misery top deck.
However, if you really want it in, or you expect to play a lot of mirror matches, you can do the following adjustments to the list:
Main deck:
-1 Ichorid
+1 Flame-kin Zealot
Sideboard:
-1 Angel of Despair
+1 Ichorid
I think 4 Ichorids are needed across your 75 and they gain a lot of relevance in games 2 and 3 where you might need to grind the game out and having access to more threats in those games is a good way to prevent a massive impact from your opponent’s graveyard hate.
Sideboard
- 4 Chain of Vapor: I just love the versatility of Chain of Vapor. Also, if we aim to have The Perfect Dredge, being blue is definitely a boon as it is easier to cast.
- 3 Ancient Grudge: the ability to play it “as-you-dredge” is very important. When playing Dredge, oftentimes you will naturally draw just the cards of your initial hand this means that if you can’t draw the anti-hate piece in your initial grip you might not be able to see it unless… is a flashback card that you can be played from your graveyard after you Dredge it away. Ray of Revelation is not as good, in my opinion, because your main target, which is Leyline of the Void, prevents you from playing it “as-you-dredge”.
- 3 Firestorm: I see, broadly speaking, Firestorm and the natural replacement of Breakthrough in games 2 and 3. As powerful as Breakthrough is, it is a bit of an all-in kind of card which can backfire badly when your opponent is fully packed with hate.
- 2 Tireless Tribe: Similarly, having a bigger density of repeatable enablers in post-board games maximizes your chances to rebuild your plan after you have your graveyard swiped by a Tormod’s crypt or similar. It is also great to have access to a decent blocker if you plan to drag the game longer.
- 1 Iona, Shield of Emeria: not much to add. It is a silver bullet that wins some popular match-ups on her own like Strom (of any kind: Tendrils or Brain Freeze) or Burn.
- 1 Ancestor’s Chosen: great vs face aggro, namely Burn or Zoo. It can also steal some games vs Storm Tendrils.
- 1 Angel of Despair: an “as-you-dredge” solution to annoying cards like Blazing Archon or Ensnaring Bridge. note you can play it twice with both Dread Returns if you manage to sac it in between, with a Cabal Therapy for instance. This would become a Terastodon if I expected more Stax-like prison decks in the metagame.
In order not to make the article longer, I leave you here a link to my sideboard plan. You can download it in case you are interested.
Parting thoughts
Ok, I think I have achieved my goal! I can say I understand Dredge a lot better now (and hope you do too) and I managed to find a more stable version of the deck, I found The Perfect Dredge.
If you made it this far means I did something not too bad 🙂
Hope you have enjoyed the read. I am happy to discuss any, or all!, points with you through Social Media (Facebook Group or DIscord, feel free to PM me!)
And don’t forget to get inspiration by checking out this hilarious video of the GOAT MTGRemy! You won’t draw cards, you’ll just plunder!